


One of my favorite parts of cooking, besides of course eating, is to be able to recreate a delicious dish from a restaurant. Even better is when I am able to make that dish just as good. I recently was at a Thai restaurant where I tasted a Larb dish that was spectacular. In an effort to recreate this dish I perused the internet and came across Giada De Laurentiis Turkey Larb recipe.
The Larb I ate at this restaurant was savory, spicy and very fresh thanks to the addition of what seemed to be a generous amount of lime juice. Once I came across Giada’s recipe I knew that I had a winner. I loved how the ingredients were fresh, simple and my favorite part was the citrus based dressing which brings the perfect amount of tart freshness that I absolutely love.
While I have yet to perfect other Thai dishes such as Pad Thai and Panang Curry that are favorites, this Larb is super simple and delicious. My deep love of Thai food will keep me on the hunt and working towards making the perfect Thai dish, however in the meantime this one is a keeper and one I will continue to make over and over.
Giada De Laurentiis Turkey Larb Recipe
Ingredients
Dressing
1/3 cup fresh lime juice, from about 5 limes
3 tablespoons fresh lemon juice, from 1 large lemon
2 tablespoons fish sauce*
2 tablespoons honey
Larb
3 tablespoons vegetable or canola oil
1/2 red onion, diced
3 shallots, thinly sliced
1 (4-inch) piece lemongrass, minced (about 1/4 cup)*
1 Thai chile, such as prik kee noo, or 1 serrano chile, stemmed and thinly sliced*
Kosher salt
1 1/2 pounds ground turkey, preferably dark meat
1/2 cup chopped fresh mint leaves
Freshly ground black pepper
1 head butter lettuce, leaves separated
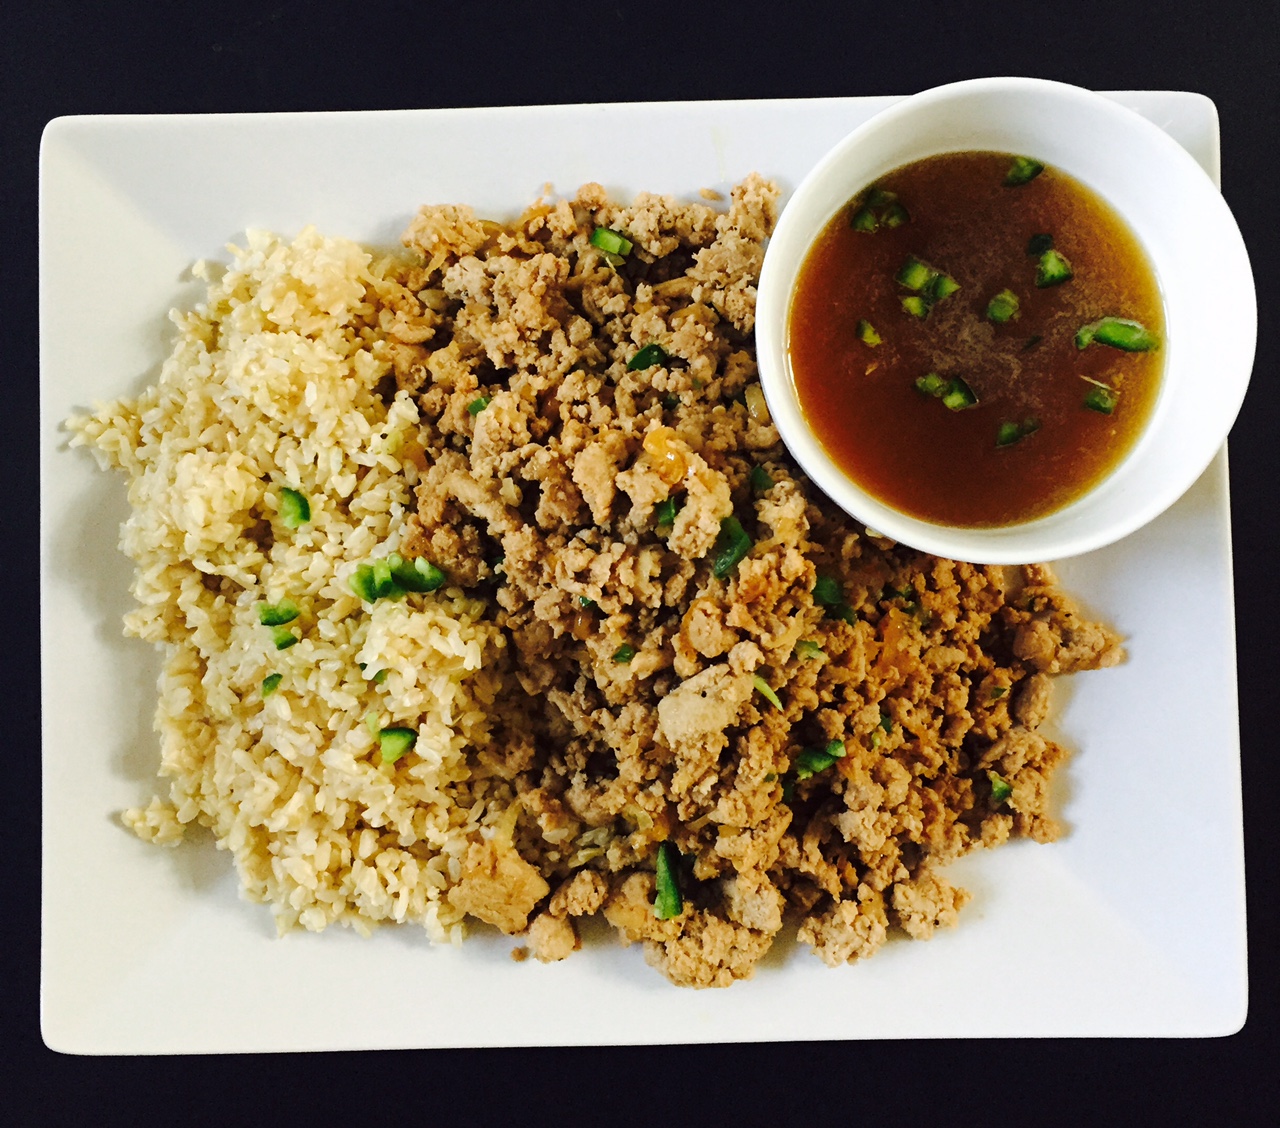
1 cup brown rice (this is not part of Giada’s recipe, but I served mine with brown rice and loved it)
Directions
Dressing: In a small bowl, whisk together the lime juice, lemon juice, fish sauce and honey. Set aside.
Larb: In a large skillet, heat the oil over medium heat. Add the onion, shallots, lemongrass, chile, and salt, to taste. Cook until the vegetables begin to soften, about 5 minutes. Add the turkey and season with salt. Cook, stirring frequently, until the meat and vegetables are cooked through, about 5 minutes. Add the dressing to the pan and cook for 2 minutes. Remove the pan from the heat and stir in the mint. Season with salt and pepper, to taste.
Spoon the turkey mixture onto the lettuce leaves and arrange on a serving platter. Serve with sticky rice.
![FullSizeRender[1]](http://www.lipstickblogger.com/wp-content/uploads/2015/09/FullSizeRender1.jpg)
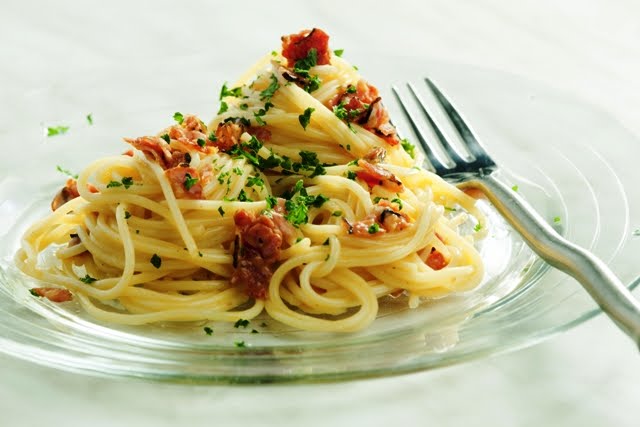
Yes, the title is correct – A Light AND Healthy Spaghetti Carbonara. I recently picked up a magazine featuring the best light & healthy recipes of 2010 from America’s Test Kitchens. I absolutely love America’s Test Kitchens because not only are their recipes full proof, they explain the science behind the recipe and I find it fascinating.
For this lightened up Spaghetti Carbonara they used ingredients such as fat-free evaporated milk and mayonnaise to create a creamy sauce without a ton of added fat. I would have never thought to use these ingredients in a carbonara, but let me tell you – it is fabulous and the calorie/fat content isn’t so shabby either. Coming in at 410 calories per 1-cup serving, this comes in way under an original carbonara recipe and I didn’t miss the original one bit. I hope you enjoy it as much as my husband and I did.
Light & Healthy Spaghetti Carbonara
(adapted from America’s Test Kitchen)
Ingredients
2/3 c. Pecorino Romano Cheese, grated
1/4 c. fat-free evaporated milk
2 T. mayonnaise
1 large egg
1 large egg white
2 ounces Canadian Bacon, chopped coarse
2 slices bacon, chopped coarse
3 garlic cloves, minced
1 t. pepper
1/3 c. dry white wine
1 pound spaghetti
Salt
1 T. chopped, fresh parsley
Directions
Process the cheese, evaporated milk, 1 1/2 T. of the mayonnaise, egg and egg white in a food processor until smooth, about 15 seconds; leave the mixture in the food processor.
Cook the Canadian bacon and bacon together in a 12-inch non stick skillet over medium heat until the fat has rendered and the bacon is browned, about seven minutes. Using a slotted spoon, transfer the bacon to a paper towel-lined plate and set aside.
Add the garlic and pepper ot the fat left in the skillet, and cook over medium heat until fragrant, about 30 seconds. Stir in the wine, bring to simmer, and cook until thickened slightly, about one minute. Cover to keep warm and set aside.
Meanwhile, bring four quarts water to a boil in a large pot. Add the pasta and 1 T. salt, and cook, stirring often, until al dente. Reserve 1/2 cup of the cooking water, then drain the pasta and return it to the pot. Toss the pasta with the remaining 1 1/2 t. mayonnaise until coated.
With the food processor running, slowly add the wine mixture and 1/4 cup of the reserved cooking water to the egg mixture, and process until smooth and frothy, about 1 minute. Immediately pour the egg mixture over the pasta and toss to combine, adjusting the sauce consistency with the remaining reserved cooking water as desired. Stir in the bacon and season with salt to taste. Sprinkle with parsley and serve.
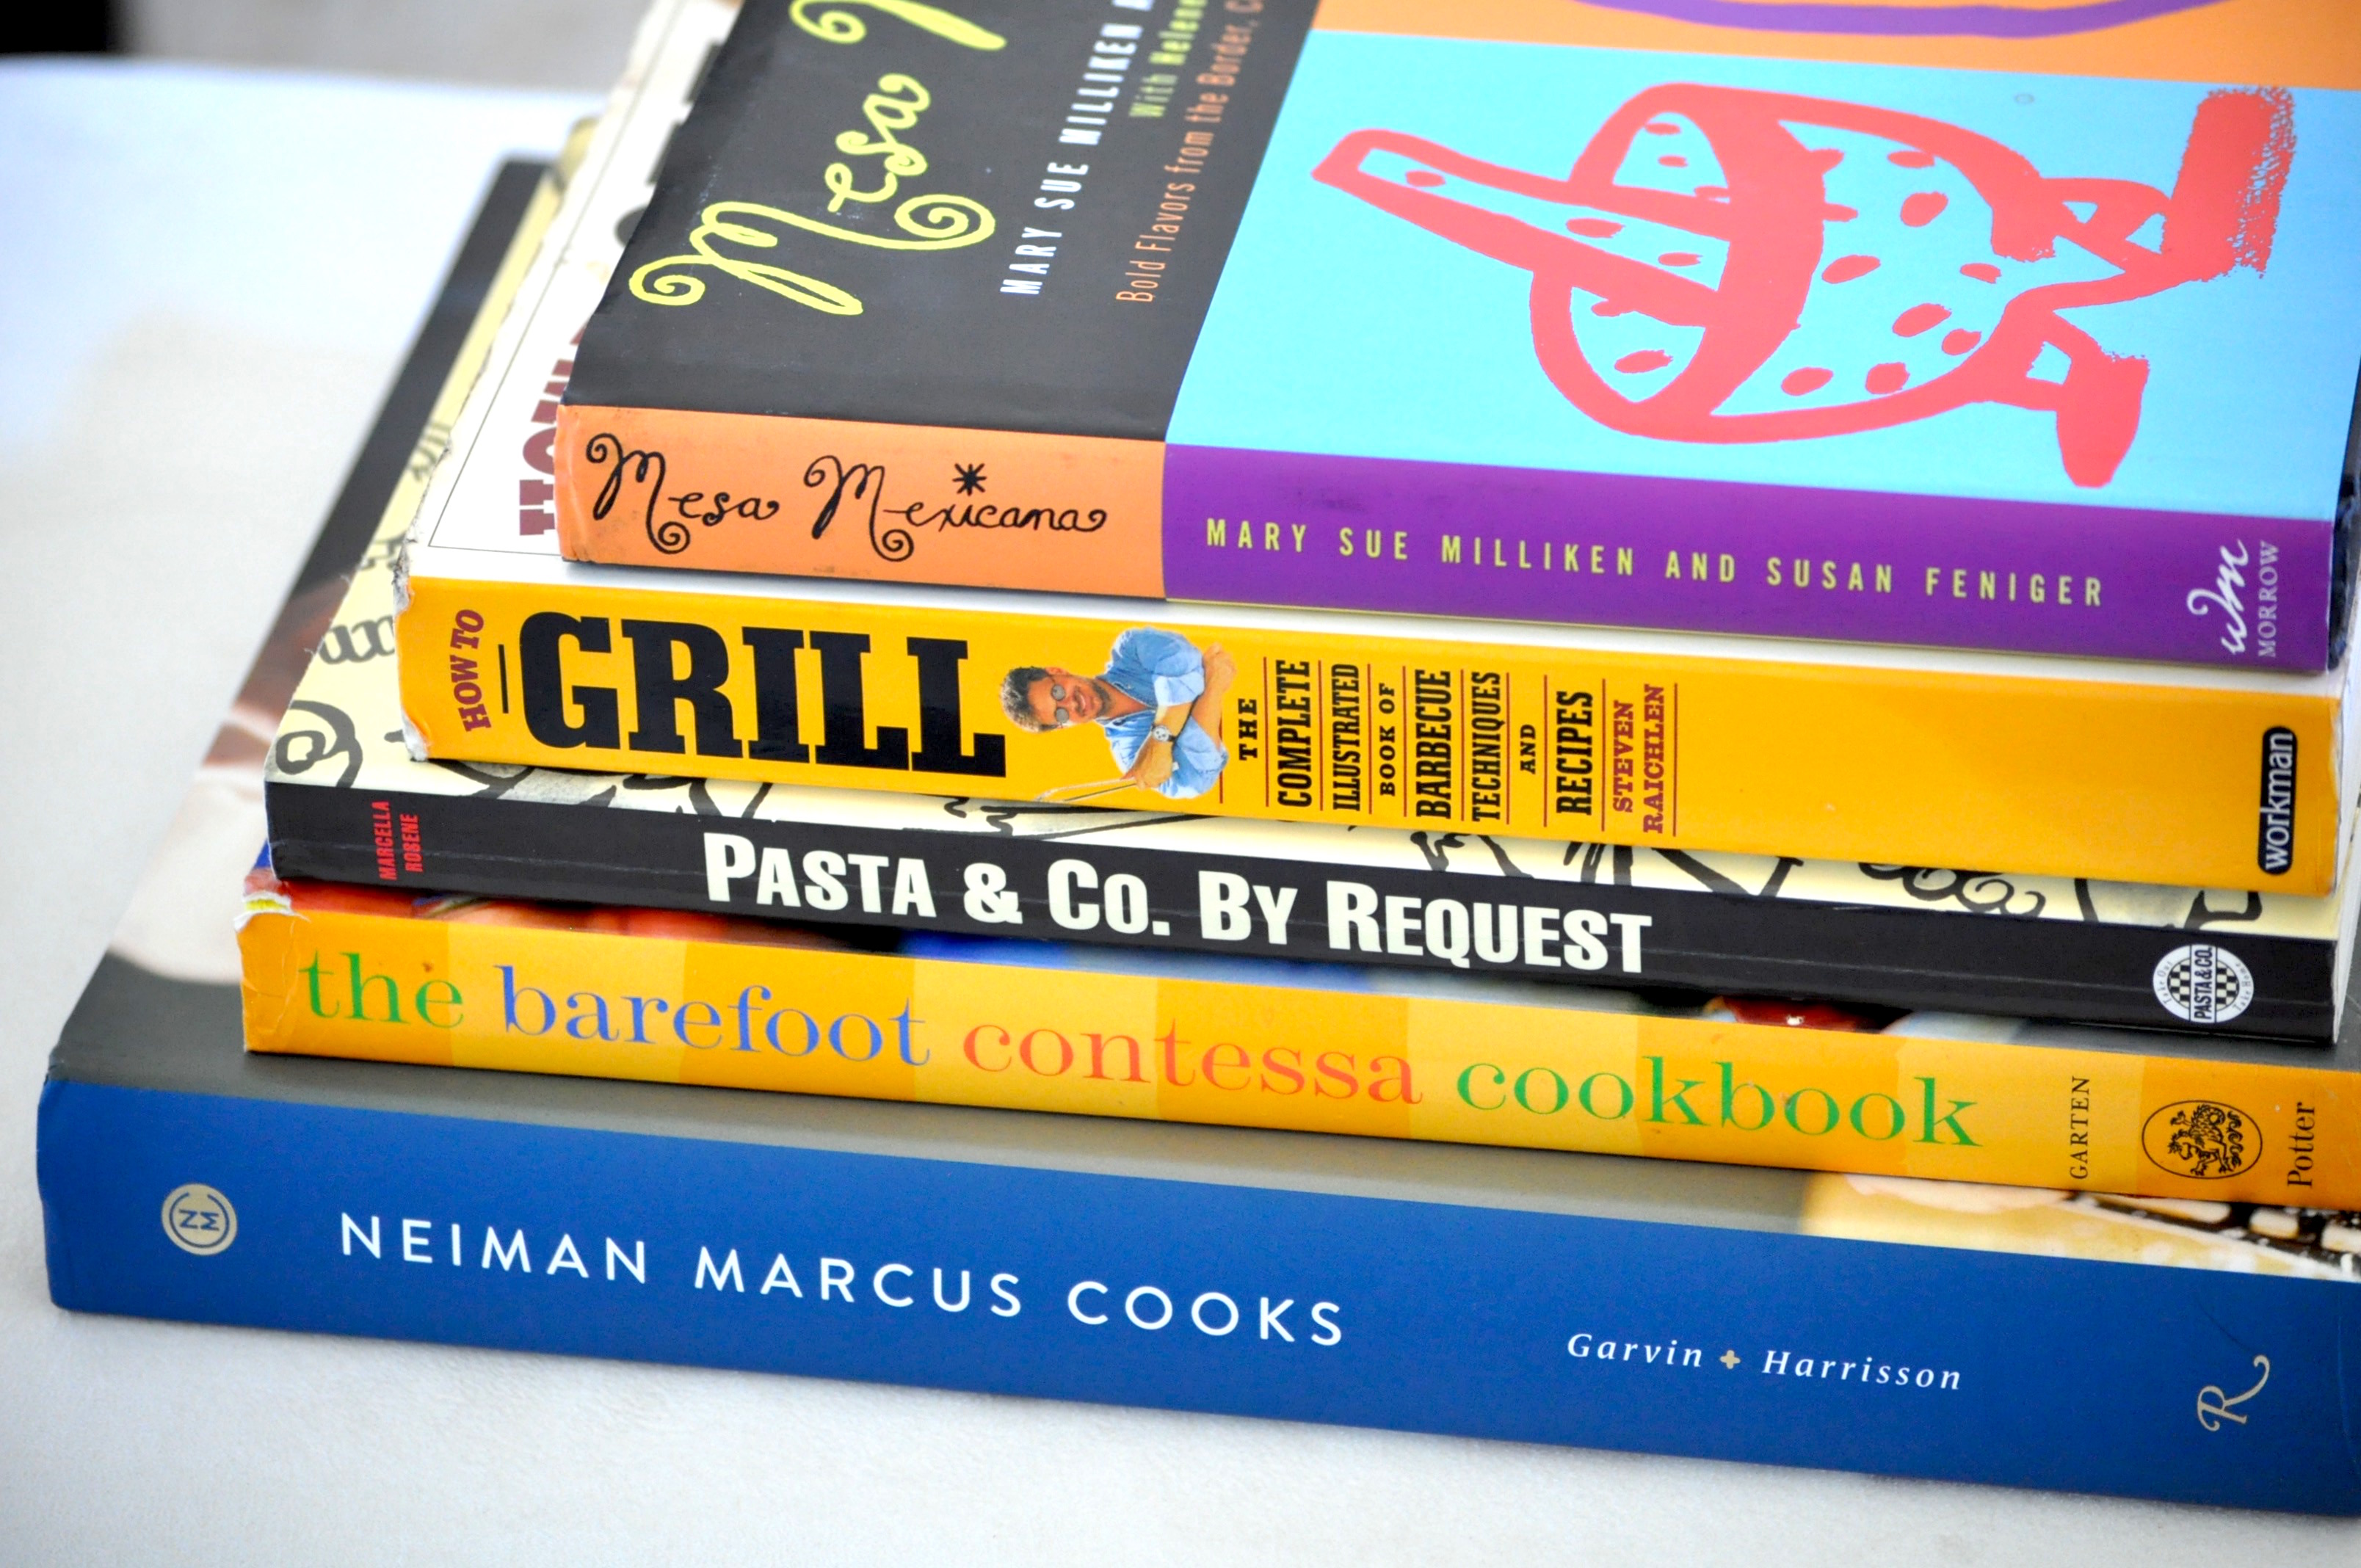
I love cookbooks, they are one of the only actual books that I still enjoy buying. I have become so accustomed to purchasing books on my Kindle and while my Kindle is great for reading a novel, I am unable to truly appreciate or peruse a cookbook easily on the device. So while I try my best to avoid clutter, when it comes to cookbooks I just can’t resist. Here are a collection of my all time favorites, I hope you enjoy my selections and hopefully see something new.

The Barefoot Contessa Cookbook
I have collected every one of Ina Garten’s cookbooks over the years and all are amazing, however I have to say that this one is my favorite. Everything I have ever made tastes delicious and so many of the recipes have become regular favorites that I cook time and time again. Some of my favorite recipes include Ina Garten’s Pan-Fried Onion Dip (always a crowd pleaser), Cheddar Corn Chowder (the perfect soup on a cold evening), Gazpacho, Grilled Salmon Salad, Turkey Meatloaf, Filet of Beef Bourguignon, Outrageous Brownies and the amazing Coconut Cupcakes. These are just a few of the dynamite recipes that are favorites, but believe me when I tell you I have yet to make a recipe from this cookbook that isn’t fabulous.

Pasta & Co. by Request If you live in the Seattle area, chances are you have heard of a little deli by the name of Pasta & Co. Inside of this deli are freshly made salads, artisan meats, cheeses, gourmet spreads, dips, crusty bread and don’t even get me started on the smell of this place. This is one of those gems where you walk in and are immediately stricken by the freshness of herbs, olive oil and all around deliciousness. This book offers up so many delicious favorites that are staples at Pasta & Co. and have been a favorite of mine. Now, if you have time (and if you don’t live in the area you have no choice really), the recipes in this book are definitely worth making and will not disappoint. Some of my favorites include

Neiman Marcus Cooks
One of my very best girlfriends came over with this book one night and after perusing I knew I had to have it, and order it I did the second she left. The book in itself is worth buying as a coffee table book for its grandiose size and extraordinary pictures, but the recipes are truly spectacular. Some classic Neiman Marcus recipes include their Popovers with Strawberry Butter, the Neiman Marcus Salad Trio (featuring chicken salad, egg salad and tuna pecan salad) and Mandarin Orange Souffles. The Chicken and White Bean Chili are favorites along with the fresh and flavorful homemade salad dressing recipes. There is also an amazing chapter devoted just to cocktails – skinny cocktails too! Perhaps the food didn’t sell you, but if you are in the market for a good new set of cocktails this book will not disappoint.

Mesa Mexicana
For the past six years my girlfriends and I go to Vegas once a year for our annual girls trip and we always have the best time. We have our routine which includes laying out by the pool, drinking amazing cocktails, shopping, laughing our butts off and of course eating delicious food. We have a couple of tried and true restaurants that we always visit and one of these eateries is a place called the Border Grill at the Mandalay Bay Hotel. The Border Grill is a restaurant that was started by Susan Feniger and Mary Sue Milliken and Mesa Mexicana is the cookbook with many of the dishes found at the Border Grill. Favorites include their salsa recipes, specifically the Tomatillo Salsa and Pureed Tomato Salsa Cruda. Other favorites include the Turkey Tostada Salad and the Grilled Marinated Skirt Steak.

How to Grill
My husband got into grilling a few years back and this is the book he bought. I was skeptical at first since I had never heard of it and from the outside looking in, it just didn’t look like the kind of cookbook I would normally buy – think very utilitarian. Boy was I wrong. Every single recipe that my husband has ever made from this book has been delicious and has recipes that are very different from any other cookbooks that I currently own. Amazing recipes include Ginger Soy London Broil, Asian Grilled Beef Salad, Bourbon Brined Pork Chops, Asian Flavored Vegetables Grilled in Foil Packets and Barbecued Cabbage.
Do you have any favorite cookbooks? I would love to hear any recommendations!
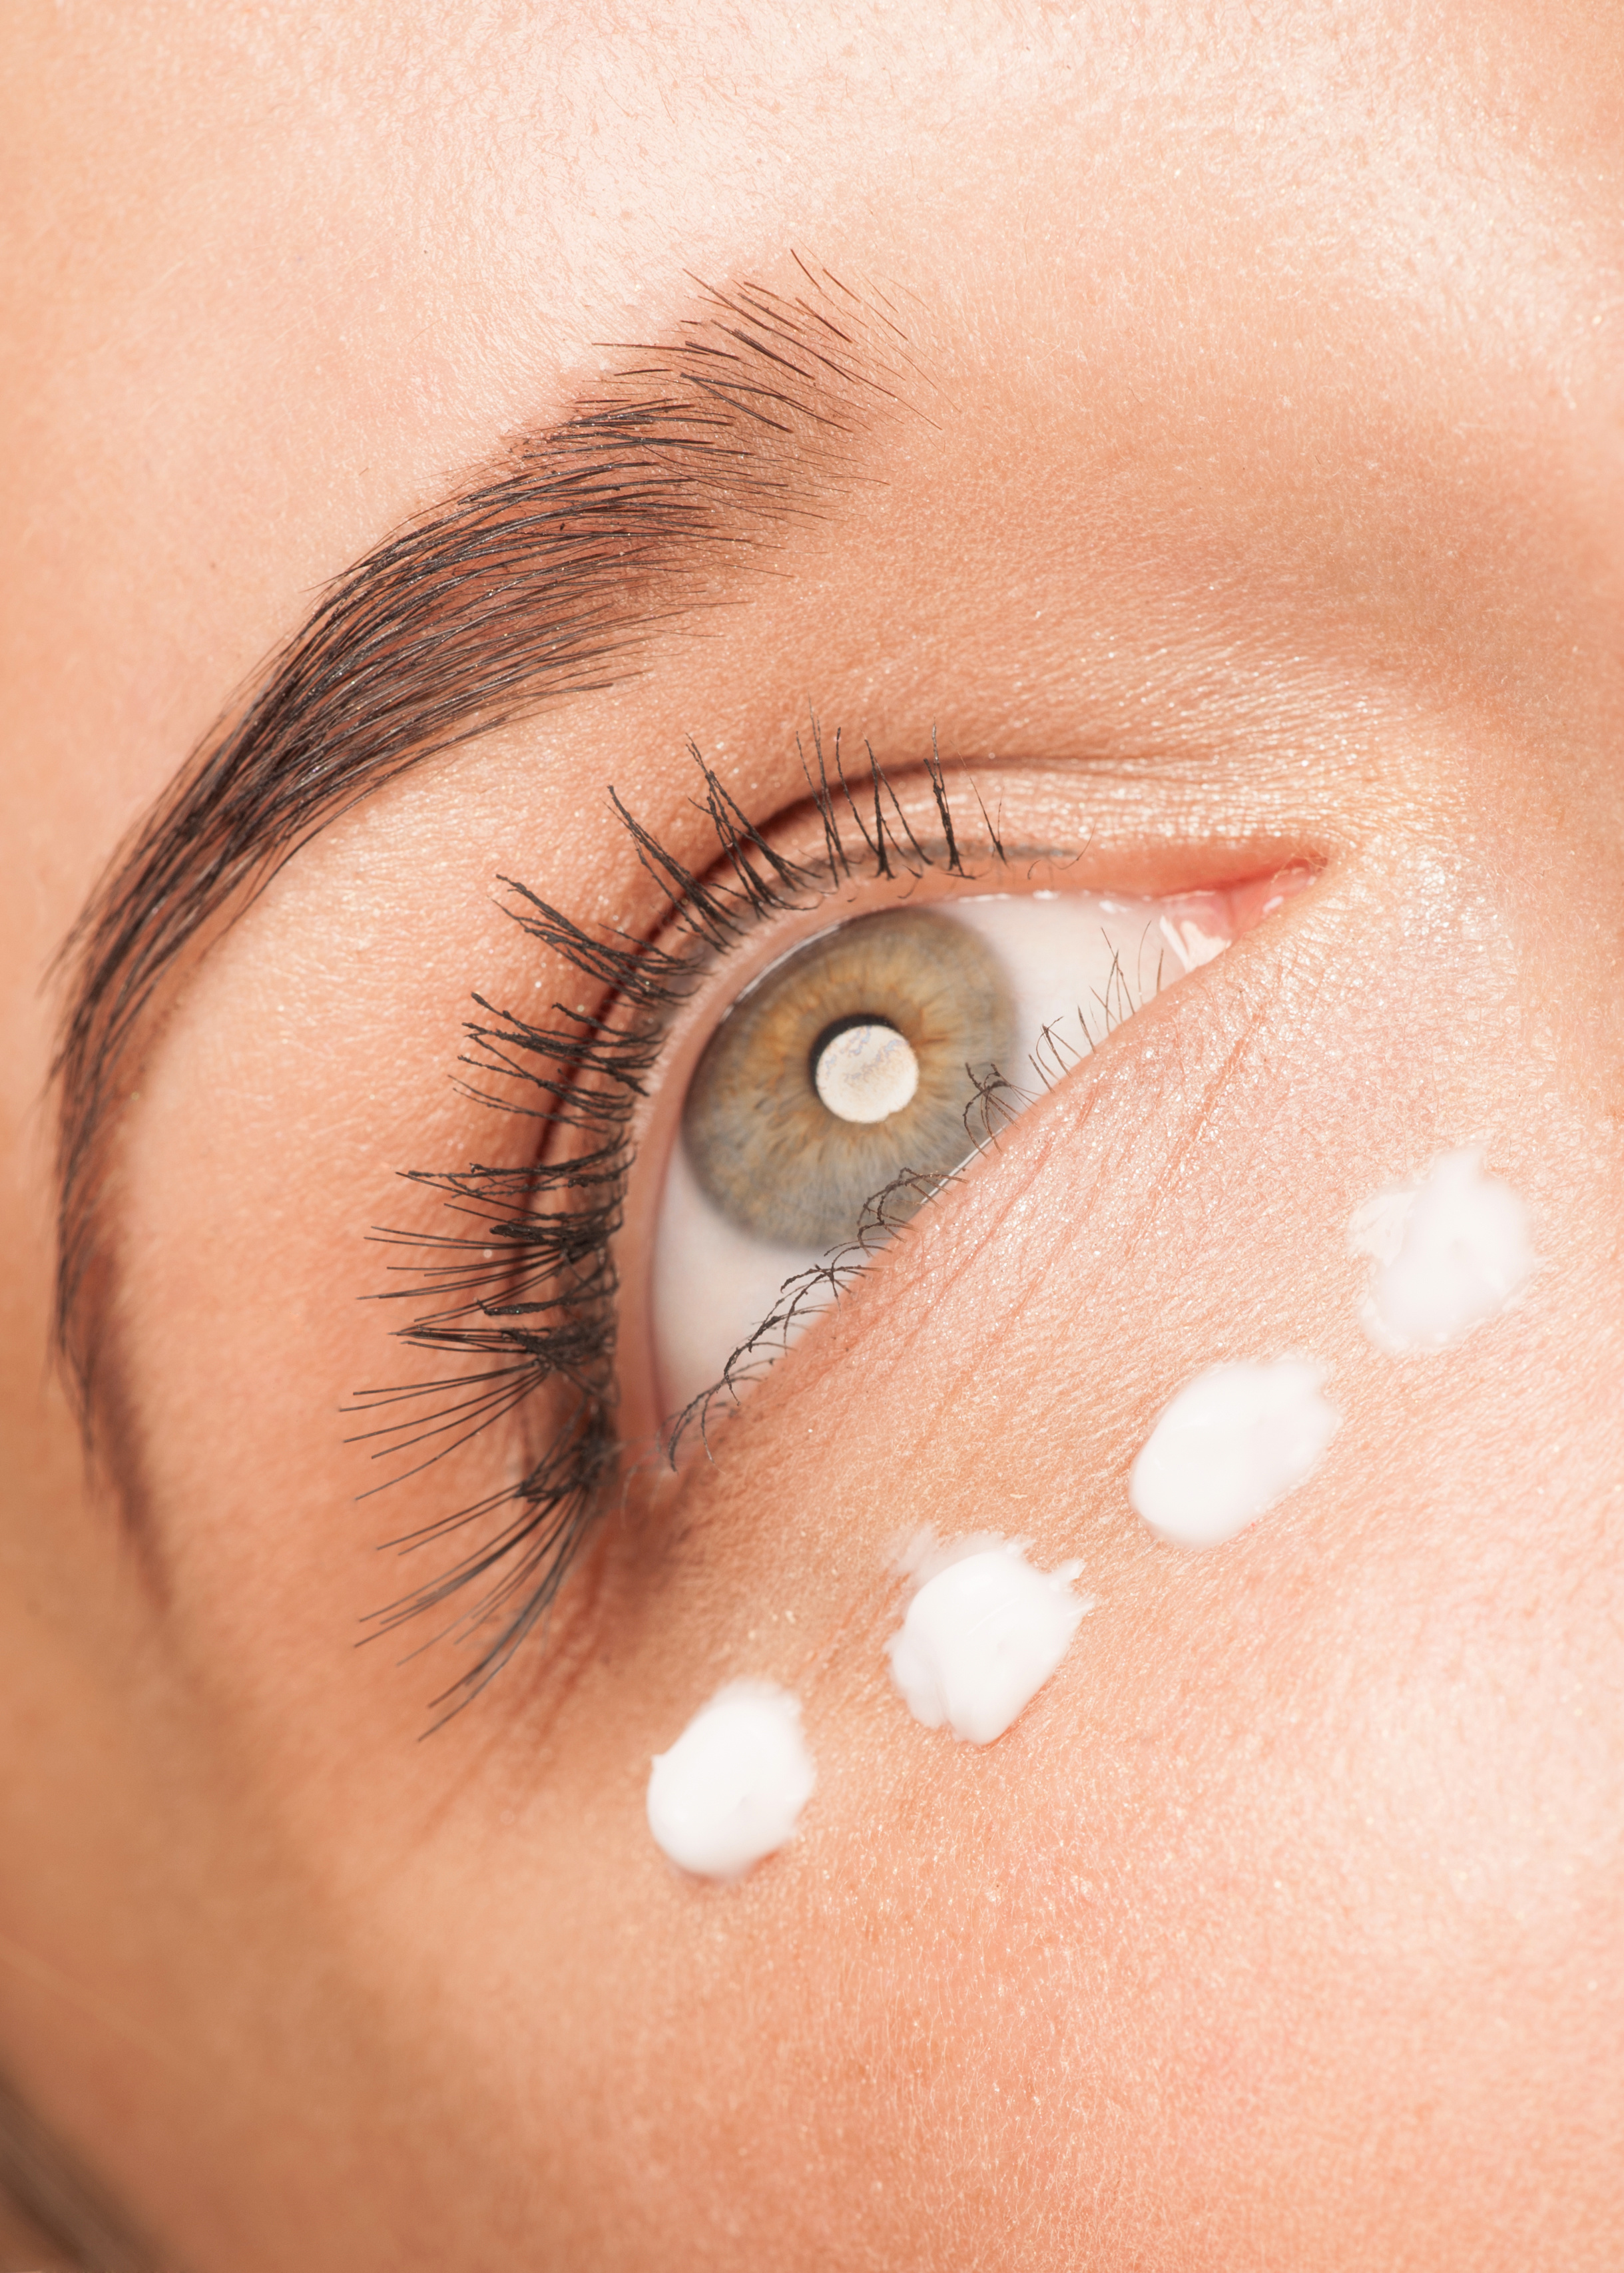
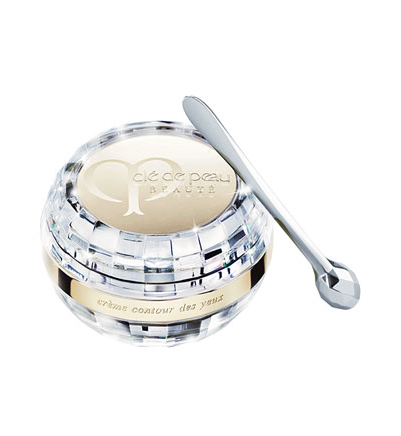
I am about to get real, real expensive. Cle de Peau expensive. If you aren’t familiar with Cle de Peau this haute couture cosmetics collection was founded in 1982 with the claim to fuse both technology with refined aesthetics. Products in this makeup/skincare line can retail for several hundred dollars, which is why I have always avoided this brand. I simply didn’t believe anything that they could offer would be worth paying that price tag, however I was given a sample of the Cle de Peau Intensive Eye Contour Cream that changed my thinking.
I was at book club and one of my girlfriends received a bag full of Cle de Peau samples from the salesgirl at Neiman Marcus. I was a lucky recipient of one of these samples which as you can imagine from the title of this post was the Cle de Peau Intensive Eye Contour Cream. The sample I received was a tiny fraction of an ounce but I fell in love, ok I was hooked – a junkie. Only an obsession like this would make me spend the offensive $250 on a jar of this cream.
 So, let’s breakdown what makes this cream so magical (as noted on the Nordstrom website, but all claims listed I completely agree with)…
Key benefits and ingredients of this cream include:
- Supports the natural vitality of skin to counteract the appearance of wrinkles, lines, puffiness and loss of resilience.
- Replenishes and maintains moisture levels to protect against dryness and ensure a smooth, supple texture over time.
- Contains Illuminating Complex, a cocktail of powerful ingredients that creates optimal conditions for skin cells to promote exquisite radiance.
- Formulated with exclusive Clé de Peau Beauté ingredient Cellular IC Normalizer, which enhances conditions for optimal functioning of the cellular ion channel system.
As mentioned in previous posts I just turned 40 which has made me more conscious than ever about skincare and overall health. After using this cream twice daily for only a week I saw increased firmness, decreased bags under my eyes and the skin under my eyes looked overall more radiant. Another factor I should include is that you only need the tiniest amount of product, seriously just a touch. The cream is so thick and luxurious the tiniest amount is all you need. I anticipate this cream lasting around 6 months which does (sort of) help me rationalize the cost.
Like all expensive department store favorites I will be in search of a dupe for this cream. Not only because it is so expensive but because I love a bargain. I plan on trying the Cerave Eye Repair Cream next. I am crossing my fingers I like it.
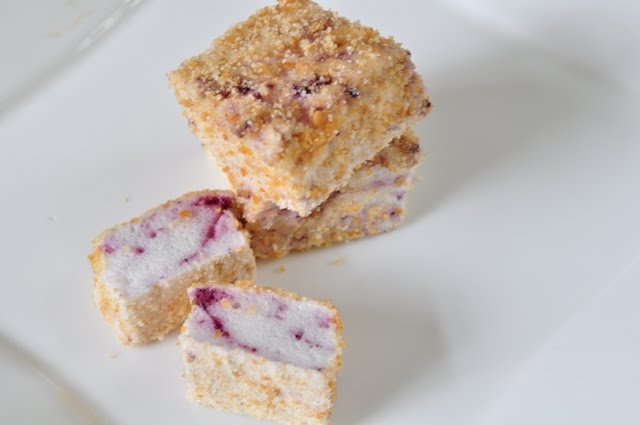
Recently I took a trip to Chelan, Washington where there was an abundance of fresh blueberries. I purchased ten pounds of berries for $5 – what a deal! Well, yes, it was a deal, but now I am faced with what on earth to do with a gizillion blueberries. There is only so much blueberry muffins, smoothies and syrup a family can take after all…enter my heavenly Blueberry Crisp Marshmallows.
I decided to get creative and make my favorite recipe for homemade marshmallows, but with a twist. Rather than dust them with confectioner’s sugar, I decided to dust them with a topping of graham cracker crumbs and swirl some fresh blueberry sauce in the marshmallows once completed.
The final result was fabulous and a great way to use up a bit of those blueberries. I fused several recipes together – Barefoot Contessa’s recipe for homemade marshmallows along with a Blueberry Sauce from All Recipes.
Blueberry Crisp Marshmallows
Ingredients
1 package unflavored Knox gelatin
1/2 cup granulated sugar
1/3 cup light corn syrup
1/8 teaspoon kosher salt
1 t. pure vanilla extract
1/2 cup graham cracker crumbs (crushed from about 7 squares)
2 T. unsalted butter, melted
1 T. sugar
3 T. blueberry sauce (recipe below)
Directions
Combine the gelatin and 1/2 cup of cold water in the bowl of an electric mixer fitted with the whisk attachment and allow to sit while you make the syrup.
Meanwhile, combine the sugar, corn syrup, salt, and 1/2 cup water in a small saucepan and cook over medium heat until the sugar dissolves. Raise the heat to high and cook until the syrup reaches 240 degrees F on a candy thermometer. Remove from the heat.
With the mixer on low speed, slowly pour the sugar syrup into the dissolved gelatin. Put the mixer on high speed and whip until the mixture is very thick, about 15 minutes.
While the marshmallow is being whipped, add the crushed graham crackers, sugar and butter together. Set aside. Grease a 8×8 inch square pan with cooking spray or butter and dust the bottom with the graham cracker crumbs. Reserve the remaining crumbs. Like this:

Once the fifteen minutes has passed, your marshmallows will be light and fluffy. They will look like this:

Add the vanilla and mix thoroughly. Carefully fold in the blueberry sauce just until you see a ribbon of blueberry and a light marbling effect. Pour into the baking pan and sprinkle with some of the remaining graham cracker crumb mixture. Let the marshmallows set overnight or for approximately 6-8 hours.
Cut the marshmallows up once they are set and dust the remaining sides with the graham cracker crumb mixture. Enjoy!
Blueberry Sauce
Ingredients
2 cups fresh or frozen blueberries
1/4 cup water
1 cup orange juice
3/4 cup white sugar
1/4 cup cold water
3 tablespoons cornstarch
1/2 teaspoon pure vanilla extract
1/8 teaspoon ground cinnamon
Directions
In a saucepan over medium heat, combine the blueberries, 1/4 cup of water, orange juice, and sugar. Stir gently, and bring to a boil.
In a cup or small bowl, mix together the cornstarch and 1/4 cup cold water. Gently stir the cornstarch mixture into the blueberries so as not to mash the berries. Simmer gently until thick enough to coat the back of a metal spoon, 3 to 4 minutes. Remove from heat and stir in the almond extract and cinnamon. Thin sauce with water if it is too thick for your liking.


